FRONT STRUT REPLACEMENT Page 2-2
Page 1 and 2
Front Install
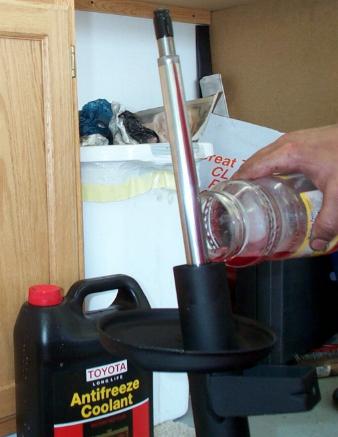
1) Insert the new damper in the strut housing. Add a coolant or oil bath in
the housing, filling it up about 1-2" below the top of the assembly. Consult
your strut instructions for more about this.
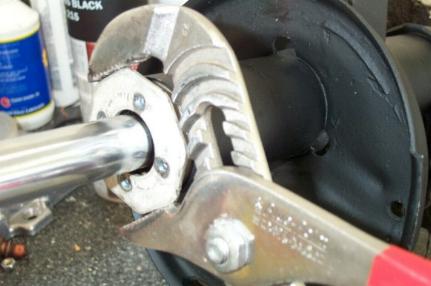
2) Place the housing in a vice and tighten the gland nut (a new one should've
come with the struts) with a large pair of channel locks or monkey wrench. Make
sure not to score or scratch the dampener.
3) Once the appropriate torque is applied to the gland nut measure the
distance left in the threads. It should be within spec of the dampeners. Consult
their directions. You may need to obtain a spacer. (btw, I had no problems with
the Illuminas.)
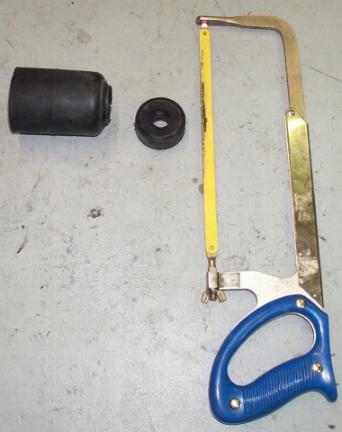
4) If you are replacing the stock springs with performance lowering springs,
you most likely will need to cut the stock bumpstops. Consult the directions
that come with your new springs. For my ST springs it was recommended to cut at
least half of the bumpstop. I cut along the notch as indicated below with a
hacksaw.
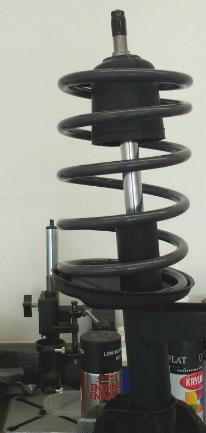
5) Slide the bumpstop on the strut, and place the new spring. Make sure the
spring is placed the correct way.
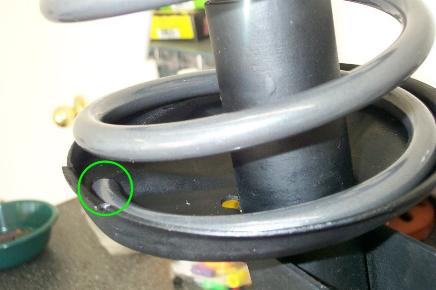
Also ensure that the end of spring sits off the edge on the lower spring
perch.
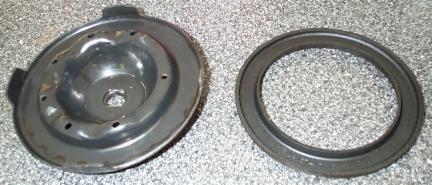
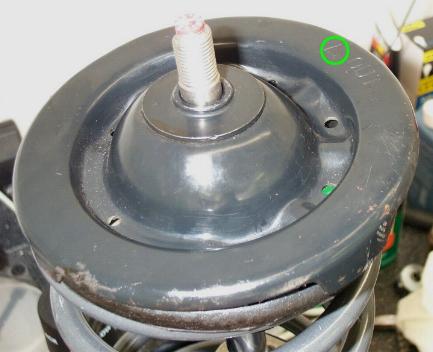
6) Next up is the insulator and upper spring perch. Notice the notch in the
perch should fit into the top of the strut, so that it fits only one of two
ways.
The correct way is so that the arrow points to the outside of the vehicle.
Double check how the assembly will fit in the car to get this right.
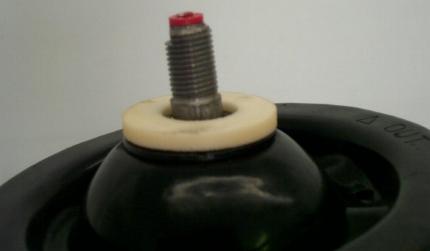
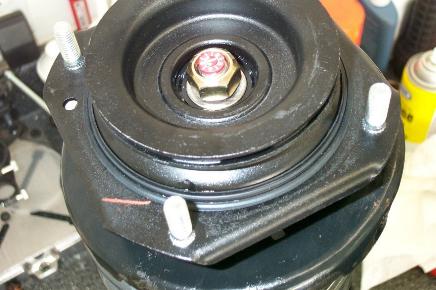
7) Slip a new dust seal over the top of the strut.
8) Now attach the strut top and the new bolt that should've came with the
struts.
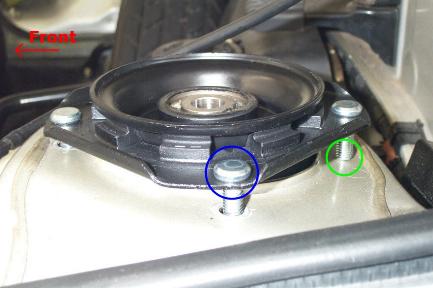
If you purchased the TRD bushing set and happen to be doing this modification
while you have the struts out, you will need to either drill a hole in the strut
mounting location or press out one of the bolts in the strut top. I decided on
drilling the holes. Here's the new strut top placed upside down to mark the
location of the new hole. The strut top only goes in one way, notice the bolt
circled in blue is offset from center.
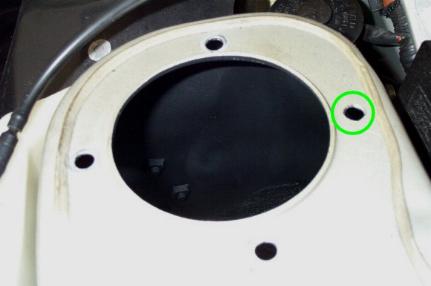
Here's the new hole.
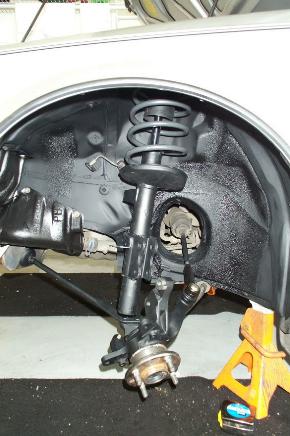
9) Now it's time to put the assembly into the car. Push the steering knuckle
out of the way and insert the top of the assembly first. Make sure to align the
stut top appropriately so that the top spring perch is pointing the correct way.
Remember the "OUT" Arrow in step 6?
10) Temporarily secure the strut assembly by placing the 3 (or 4 if you have
the TRD strut top) 14mm nuts.
11) Position the assembly onto the steering knuckle. This takes a little
wrestling with the two pieces. You may need a mallet and block of wood to
encourage them along. Insert the two 17mm bolts making sure to place the camber
adjuster in its previous location.
12) Tighten everything down to spec and put everything else back together
that you took off to get to the strut assemblies.