WATER PUMP REPLACEMENT Page 2 of 3
Page 1,
2, 3
Installation of Water Pump
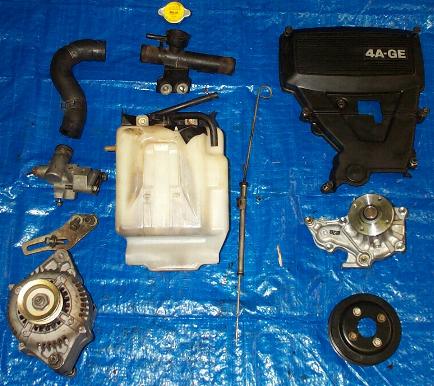
1) Time to clean everything up with Simple
Green, WD40 and Carb Cleaner and organize all the parts. Here's what all you
should have:
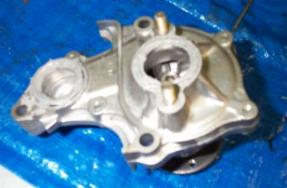
2) Permatex the 2 o-rings on the suction cover
(update: ended up not using the o-ring on the left side of this picture, I just
permatex'd the crap out of it.)
Note: If you have removed the timing belt
it is not necessary to put the suction cover and water pump on separately. You
can bolt the 2 together, and then bolt the assembly to the block.
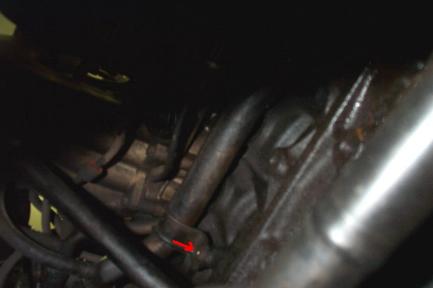
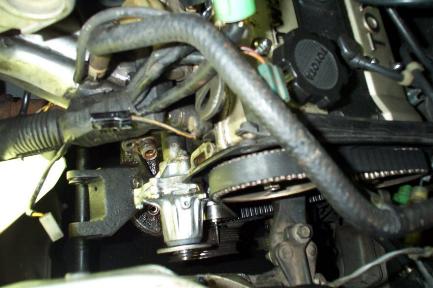
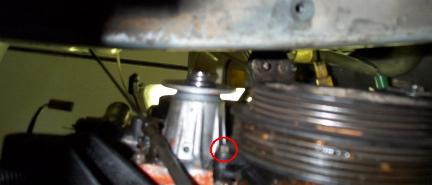
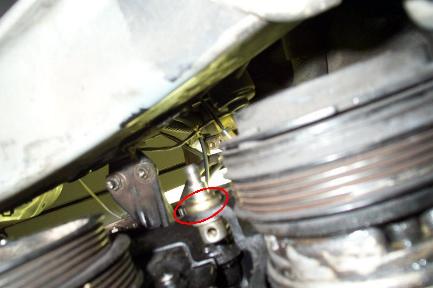
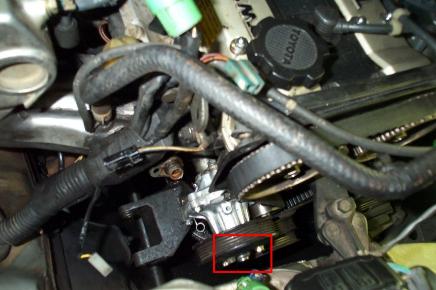
3) Loosen the coolant pipe by removing the
10 or 12mm bolt shown here, that leads from the suction cover to the thermostat housing:
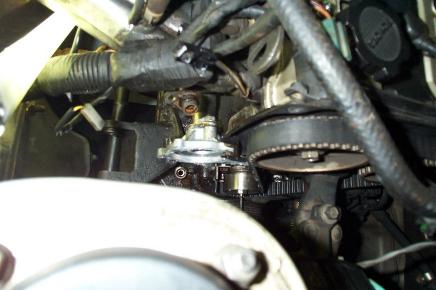
4) Very carefully, place the suction cover
onto the block and into this pipe. Make sure that the o-ring that attaches to
the block didn't shift on you and that you still have some permatex back there.
Secure (don't tighten) the cover to the coolant pipe, either from up top....
or below:
5) Permatex the crap out of the water pump:
6) Very carefully, again, place the pump
over the suction cover. Secure the pump to the cover by using a couple of the
10mm bolts to hold them together. Then line up the assembly with the block, and
bolt it down with the 10mm (the longest one) and the 12mm bolts. (Note: The 10mm
bolt for the assembly is for the uppermost hole.) Tighten down everything
securely, according to the torque specs in the BGB, 9 & 11 ft-lbs I believe.
Also, don't forget to install the oil
dipstick guide, since it attaches to the water pump. Put a lil RTV on its gasket.
7) At this point I would suggest to
reinstall the coolant inlet housing onto the engine and then taking a break.
This way after a couple hours of letting the RTV cure, you can check the water
pump for leaks by simply filling the system with water. If you notice any leaks
from simply filling it up, you will not have wasted time putting everything else
back together. Use the new o-ring and gasket that came with the pump assembly
when installing the inlet housing. Also, use some RTV on the surfaces.
8) Once you are sure that the pump isn't
leaking, you may continue putting everything back on. Start with timing cover
#2. Again, here are the 2 bolts that need to be replaced:
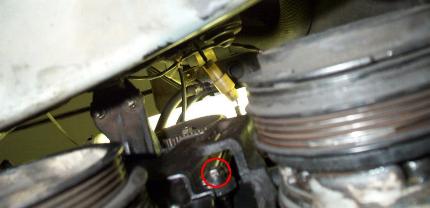
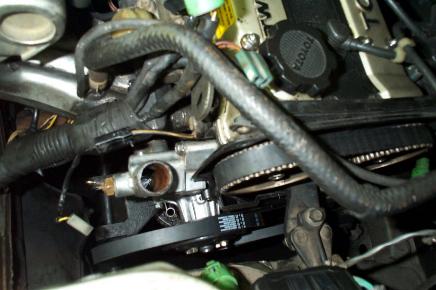
9) Next up is the AC idle pulley. Insert the bolt and it's washer (circled):
And then the pulley, 'big' washer, and the
nut. Tighten the nut down until the pulley is secure, and then make sure the
hole in the bolt head is aligned with the hole in the top of the bracket.
The red-circled hole.
Then, thread the long 15mm bolt through
the idle pulley bolt. No need to tighten it down fully, just get the threads so
they at least pass all the way through the bolt head.
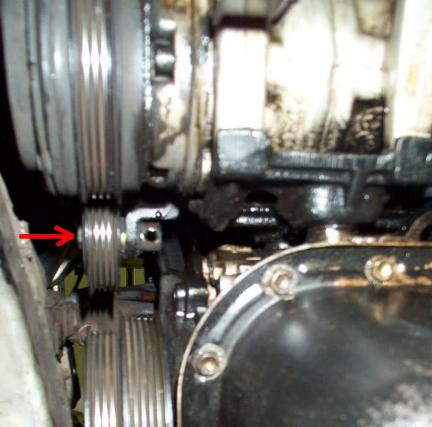
10) Next, install the water pump pulley
and bolts. Don't worry about tightening the bolts for now.
11) Install the belts. Water pump and
alternator belt go on the innermost crank pulley, then AC belt. Go ahead and
tighten the AC belt, by pushing the idle pulley up while under the car. You may
need to loosen the nut a little. I tried prying the pulley up with a big
screwdriver, but the best method I found was just by pushing it up with your
free hand, and then tightening the nut down with your other hand. Use one of
them belt tensioner gauges (or index finger) to make sure the belt isn't too
loose or too tight. Get out from under the car, and tighten down the AC idle
pulley bolt (the long 15mm one).
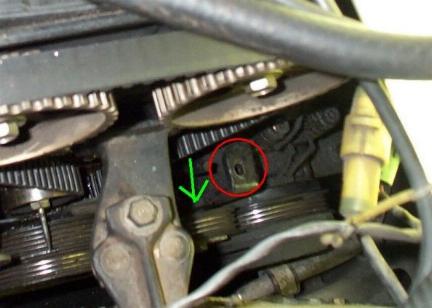
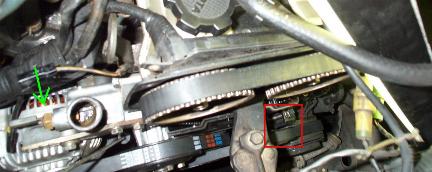
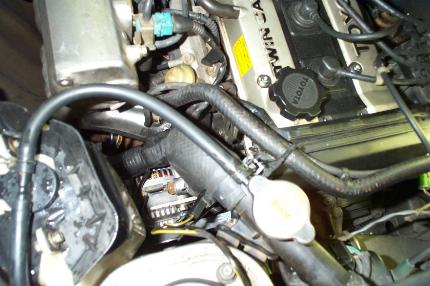
12) Re-install alternator. In the below
pic, the above mentioned AC idle pulley bolt is shown in the red square. The
green arrow is pointing to the alternator of course. If you need assistance with
the alternator refer to the alternator page.
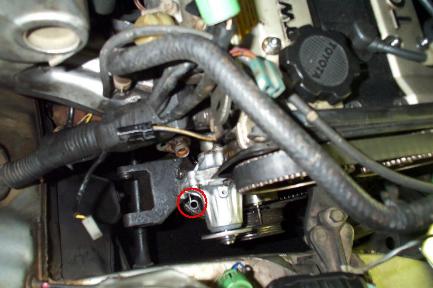
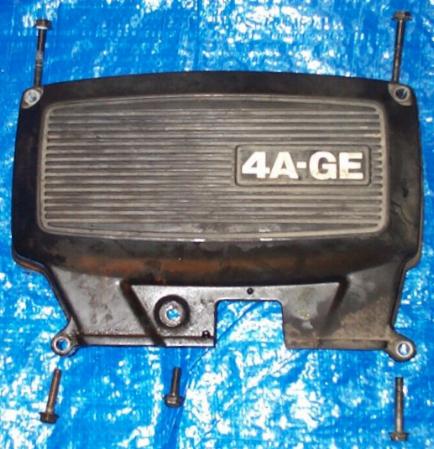
13) Reinstall Timing cover #3. Again,
here's a picture of it uninstalled so u can figure out where all the bolts are
located. The one in the bottom middle is the toughest to get to.
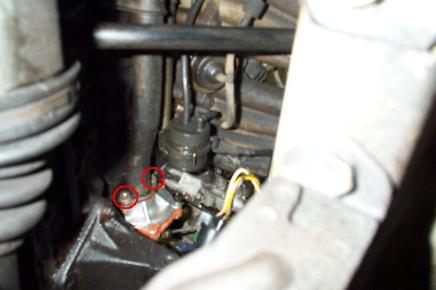
14) Reinstall radiator cap hardware and
hose. Don't forget to reconnect those 3 wire connectors. Also ground the
yellow/black wire onto the body through one of the green circled bolts.
15) And finally, the coolant reservoir:
Go to Page 3 for the coolant flush process...