FRONT BUSH REPLACEMENT Page 1-2
Page 1 and 2
I am replacing all the bushes with the TRD bush set, while I have my suspension apart. I'll try to show the removal of the
various suspension pieces. Things may be a little different if you are not
replacing everything like I am though.
*Procedure of pressing the bushes out
with just 2/3 jaw pullers courtesy of Dale Conner and Bill Merton from MR2 forum
Front Removal
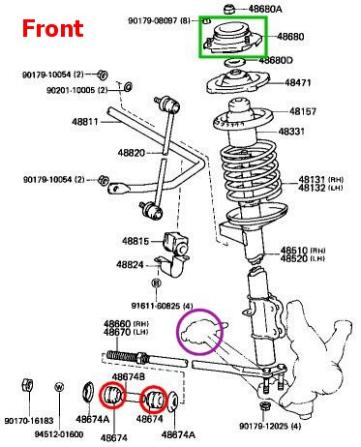
1) Here's a picture of what is replaced
with the TRD bush set: strut top (green), control arm (purple), and strut arm
(red). So, you need to remove the strut assembly and the two arms. The steering
knuckle will be close to being removed, as it will still be attached to the tie
rod end. If you don't believe you need to replace the tie rod end bushes (which
you need to purchase the entire end, not just bushes if you do), you can skip that step.
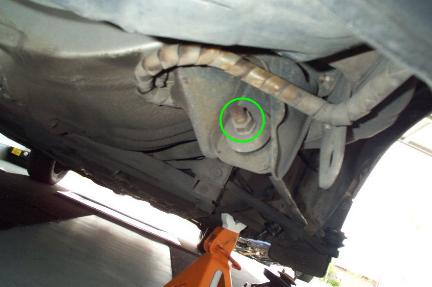
2) I would suggest loosening the strut bar
nut first. If you have a deep well 22mm socket, you can use a ratchet. Else, a 22mm spanner will work.
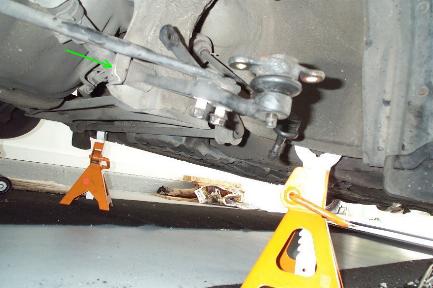
3) Loosen wheel gnuts. Raise and support the front of the vehicle. Remove wheels.
4) Just for sake of simplicity for this page, I'm going to point you to other pages where I go over the strut assembly
and steering knuckle removal. If you do not want to replace the strut top, or
have the Fensport bush set (which does not include a new strut top) then you do
not need to remove the strut assembly.
5) Measure the length of 'A' below, so that caster can be put back to the correct spot.
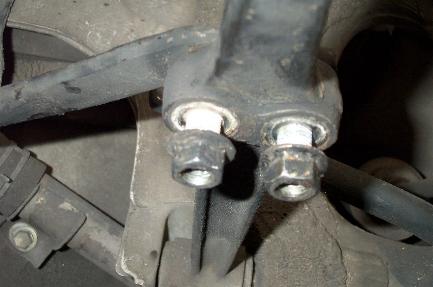
6) Remove the strut arm from the control arm, by removing the two 17mm nuts.
5) Remove the bolt that you loosened in step 1. You should then be able to remove the strut bar. Here's some pics of it.
And disassembled. The 2 bushings (green arrows) are
to be replaced by TRD ones. And the collar (red arrow) needs to be replaced with
a new one from the dealer.
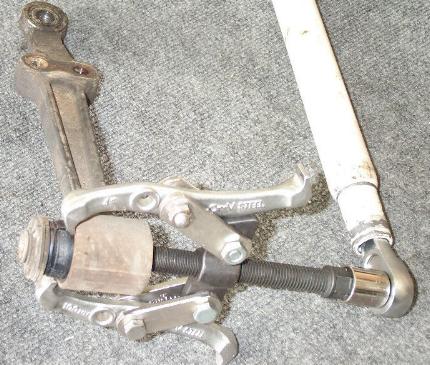
6) If you aren't replacing the ball joints, skip this step.
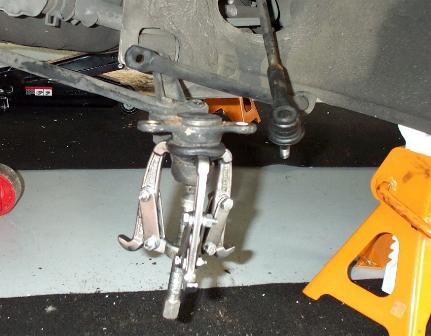
I'd suggest removing the ball joint from
the control arm at this point. Unless you have a vice handy. I placed a jack
under the control arm to raise it up and then use a 2 or 3 jaw puller to pop
it out. Beware, the ball joint will literally POP up once it is loose. So keep
away from inside the inner wing while you tighten the puller. (The below
picture was taken before I actually got the ball joint off. That's what the
strut arm is there, and the jack isn't.)
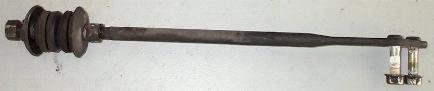
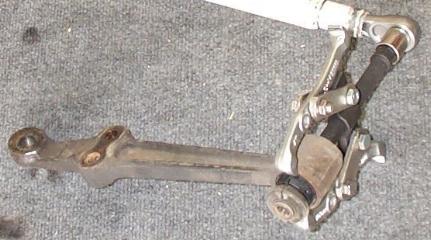
7) Remove the 17mm bolt holding the control arm to the frame of the car.
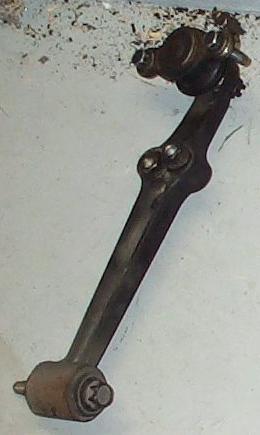
Here's a pic of the control arm out of the car (ball joint is still in place):
8) If you've noticed, there's only one bush per side
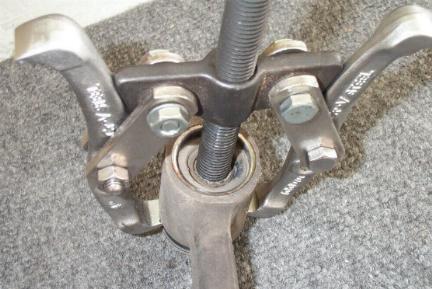
that needs pressed out in the front, the one in the end of the control arm.
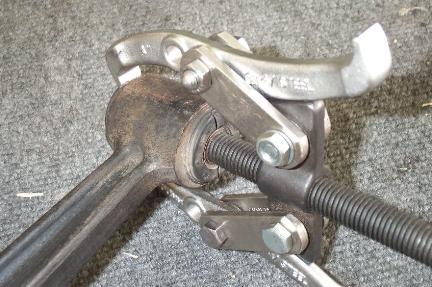
Here's some pics of how I went about doing it. The "pusher" part of the puller I
used was big enough that it didn't fit inside the bush, so I was able to just
use it, instead of using a stack of washers. It would probably be easier to put
the control arm in a vice, but since I don't have one I tried it without. It was
surprisingly easy, just have the cheater bar handy. Here's some pics of the
different steps as I was pushing it out with a 2 jaw puller.
Go to Page 2 for the install process