REPAIRS PAGE 99
BUMPER REINFORCEMENT REPLACEMENT
You will need:
10mm ring spanner, 10,14 & 17mm sockets, a 'T40' star bit
(or a coin held in the end of a pair of pliers), wire brush,
crosshead screwdriver, jack and axle stands, can of WD40 and half a litre of black Hammerite Smooth.
You may also need:
Impact driver, blowtorch, M5 & M6 taps and dies to clean up the odd rusty thread.
Method:
| Step 1: Pick the front of the car up and support on axle stands. |
|
| Step 2:Working under the car, Undo the four screws that retain the plastic protective covers from inside the wheelarch/under the pop up lamps. Two of these screws also support the leading edge of upper wheelarch liner. Remove the covers. I'd recommend wearing goggles and keeping your mouth shut whilst doing this as there's a lot of dirt and grit up there. |
|
| Step 3: Turn on the main lamps and leave the switch in the 'permanently raised' pos'n. Open the bonnet. |
|
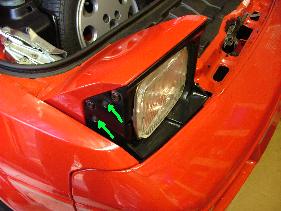
| Step 4: Remove the body coloured headlamp covers and black plastic surrounds. The surrounds come off first, then the covers. This is where ideally you'd use a star bit but there is a slot in the end of the screw that will take a coin quite nicely. |
 |
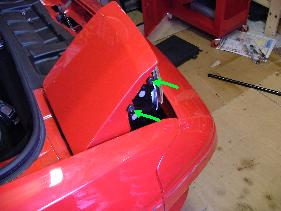 |
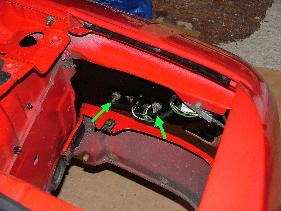
| Step 5: Undo the two nuts and two bolts at the front of the 'boot' that retain the headlamp mechanism. You'll have to move a wiring retaining clip to get to one of them on the drivers side, and remove the screenwash bottle to get at them on the passenger side. |
 |
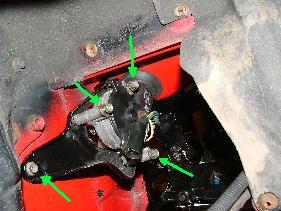
| Step 6: Working underneath the car, on each side, undo the wiring connector. Undo the final bolt securing the headlamp mechanism, and the three bolts that secure the headlamp motor from the headlamp mechanism. |
 |
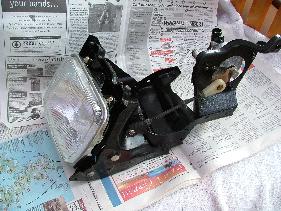
Step 7: It should now be possible to remove the pop-up headlamps, with a bit of careful manipulation. Get the 3 bolts that secure the motor to the mechanism back in asap, and try not to lose the position. (You can now see what some of the Hammerite's for. It's well worth stripping the headlamps down a touch and repainting the mechanism and the back of the reflector housing. Lets face it, how often are you going to take these out?)
The four screws retaining the front trim will most likely need to be drilled out and replaced as they probably won't turn. (Note: these are M3.5x10) The beam adjustment screws can be cleaned up with an M6 tap. |
 |
| Step 8: Undo the two retaining nuts and remove each indicator/side-light. The connectors can be difficult to separate. Forcing the clip in with a screwdriver whilst pulling like crazy does work eventually. (Don't pull on the wires though.) |
 |
| Step 9: Undo the three retaining screws and remove each headlamp 'finger guard'. |
 |
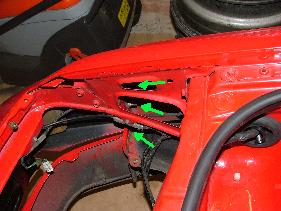
| Step 10: Undo the 3 nuts fastening each end of the bumper cover to the wing. This is a pig of a job, and why you went to the trouble of removing the lights. I'd give them a good soak in WD first, maybe overnight. These seem to get damp and corrode a fair bit, especially the bottom one. (More Hammerite on the brackets.) |
 |
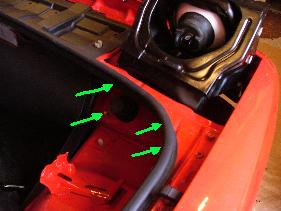
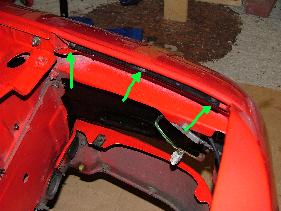
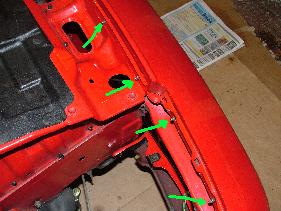
| Step 11: Undo the 9 nuts fastening the top of the bumper cover to front of the car. |
 |
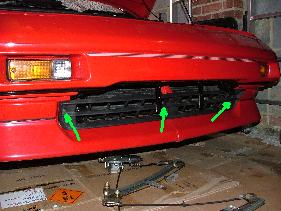
Step 12: Undo the three screws holding the plastic grille to the front of the car.
Ignore the indicators, photo taken out of sequence! |
 |
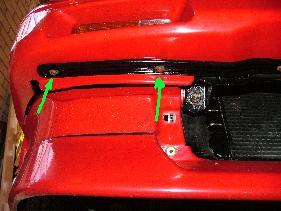
| Step 13: Undo the 9 bolts fastening the bottom of the bumper cover, and number-plate support bracket to front of the car. (Yet more Hammerite.) The plastic bumper cover should now come off easily. |
 |
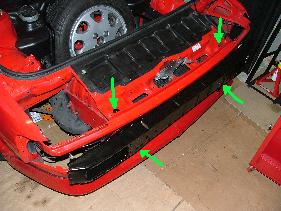
| Step 14: Using the 14mm and 17mm sockets undo the four bolts securing the reinforcing bumper to the chassis. This is where you might need a bit of heat, though not always - I didn't. |
 |
Refitting is, as the saying goes, the reverse of removal, you just skin your knuckles in different places.
The replacement bumpers have the same thin paint on them as the originals, and in many cases the paint is already crumbling off the welds. I'd recommend giving them a good paint before fitting, and spraying a thin coat of Waxoil on the inside. Take care not to block the drain holes though.
Karl Thomas, SE Region
Back to repairs index page
Back to main page