ENGINE REMOVAL - PAUL WOODS
Foreword
I often get numerous emails or phone calls from owners
wanting to have a go at removing their MR2 engine and gearbox themselves. Now
although I really don’t mind helping MK1 owners at all, I thought it was about
time someone did a step by step pictorial guide on how to do this in the most
efficient way.
Personally I remove a MK1 engine in around 2 hours but I do this type of thing everyday. For
the novice I'd expect it to take a long weekend or an afternoon for the more
experienced. Either way this guide should prove useful to someone.
Preparation
A garage is preferred to do this but not essential, and
all that matters, if it is done in a garage, is that theres at least 4ft of
roofspace above the car allowing for the rear of the car to be jacked right
up. Also a good selection of tools is needed but mainly 10mm, 12mm, 14mm and 17mm
spanners will undo just about everything. A good 2 ton plus trolley jack is
essential and a pair of axle stands. Also if theres no engine hoist above the car
for lifting the car up a 4ft long 3”x4” timber is essential for placing
across the crossmember on the front bulkhead of the engine bay for spreading the
load so that a 2 ton trolley jack can lift the whole car safely.
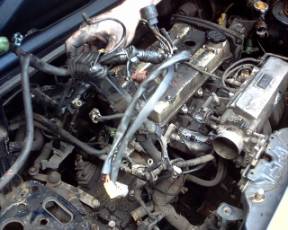
METHOD
Safety always comes first, at no time should you attempt to crawl under the car with
just a jack holding it, sounds like common sense but it needs to be said. Ok
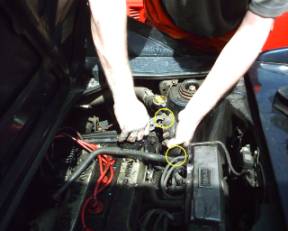
first thing to do is disconnect the battery terminals, no other wiring must be
removed until this is done first.
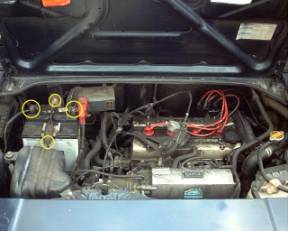
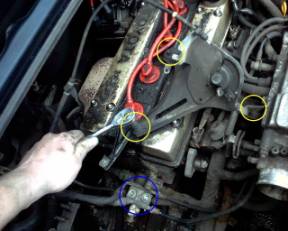
The two 10mm bolts
on the battery clamp are undone and the battery can be removed - for safety
always remove the earth clamp first, a swinging spanner on the positive terminal
touching the car body can cause a nasty burn, and in extreme cases a battery
explosion - not good!
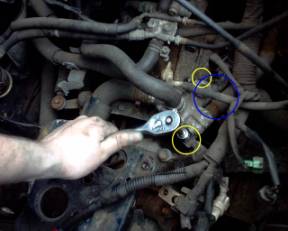
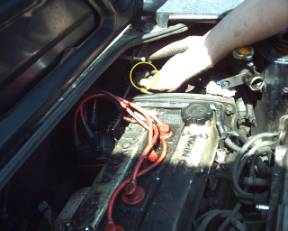
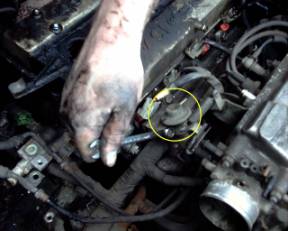
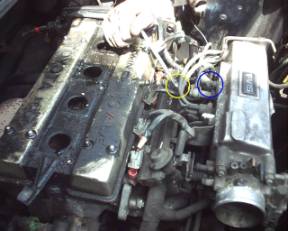
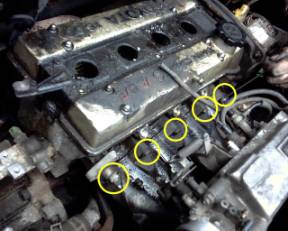
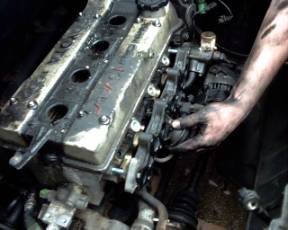
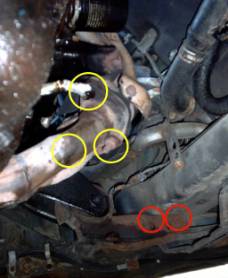
Next all of the
yellow circled bolts or clips are undone and the plastic box removed. The red
circled areas show the idle up VSV which must be unplugged and its vacuum pipe
removed from the inlet on the blue circle. The intake tubing can now be removed.
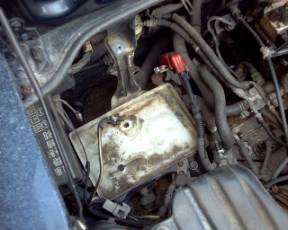
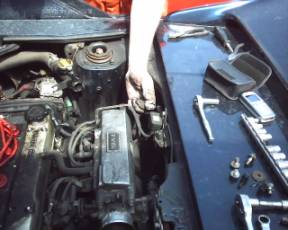
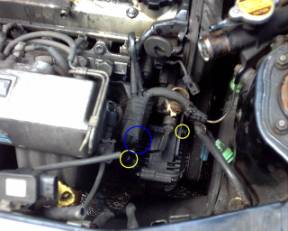
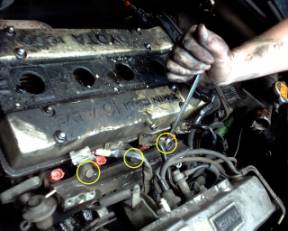
The reversing light
switch is now unplugged and the two 12mm nuts removed from the thermostat
housing together with the gearbox earth strap and the two hoses circled blue.
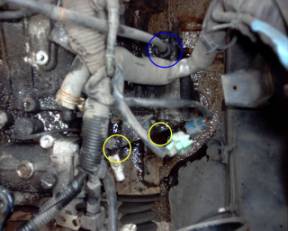
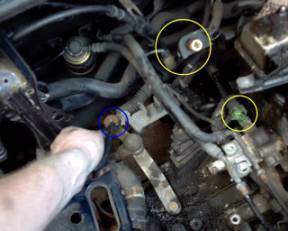
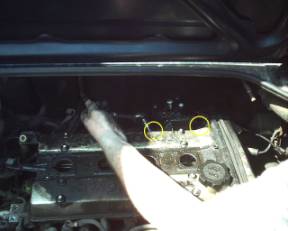
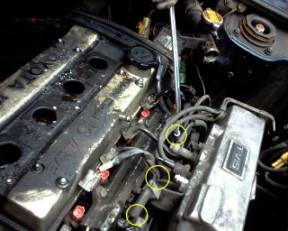
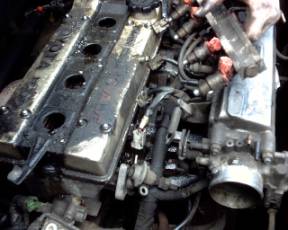
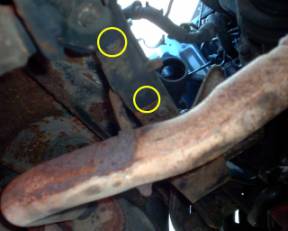
The remaining
heater and radiator hoses are removed from the thermostat housing together with
a brown temp sender plug. On the right the two yellow circles roughly depict
where two 12mm bolts must be removed from the driveshaft shield and the speedo
cable circled blue is also unscrewed, this may be seized so lube it generously
with wd40.
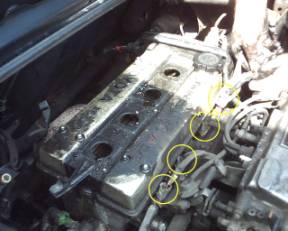
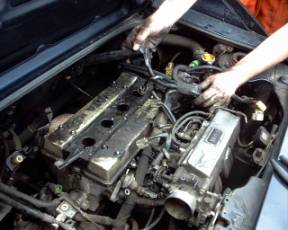
Next the three
bolts holding the throttle linkage are removed and the throttle linkage bar
prised off, the linkage can be tucked behind the battery tray, also circled blue
the two 12mm bolts are removed to free the fuel lines from the coolant
housing. On the right the electrical plugs are removed from the coolant temp
sensor and engine bay fan probe. Also one of the gear change cables is removed by
taking out its split pin.
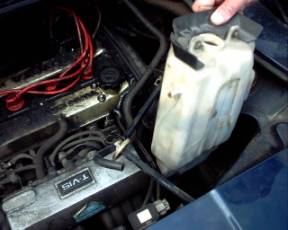
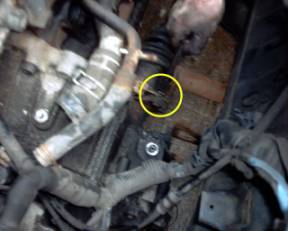
The two 12mm bolts
holding the clutch slave cylinder onto its bracket can now be undone but this
won't come off until a larger bolt is removed from under the car. On the right the
expansion bottle is removed.
Next the brake
servo clip is removed and the pipe taken off. Also the two large clips on the
coolant filler point hose are removed and this hose removed too.
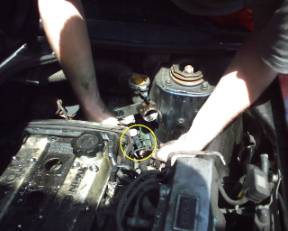
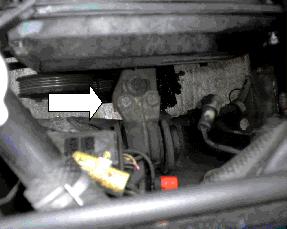
Now the MAP sensor
can be unplugged and its vacuum hose removed from the manifold. On the right the
TPS sensor is also unplugged.
Now remove the
rocker cover breather pipe and also start disconnecting the distributor
wiring/coil pack and oil pressure sender switch wire that is directly below the
distributor.
Unplug the HT leads
and remove, now undo the two 12mm bolts holding the distributor in place and then
slide it out. It may need to be rotated left and right when doing this as they
are a tight fit.
The remaining
coil/amplifier wiring plugs need to be disconnected along with an earth
connection. There should be nothing else electrically connected in this area now.
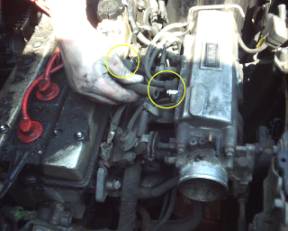
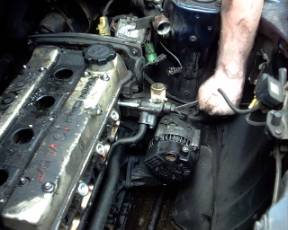
You
can now undo the two 10mm bolts that hold the fuel pressure regulator onto the
fuel rail, once this is off the fuel line can be tucked behind the battery
tray. Also disconnect the alternator thick white feed wire, unplug the
mulitplug from its rear (blue) and undo the 12mm bolt on the alternator
adjusting arm. Remove the 14mm bolt from underneath the alternator and remove it
from the engine bay.
You aren’t able
to see the bolts in question but there are three 10mm bolts on the inlet
manifold, two of them secure a fuel line and the wiring harness to the manifold
while the third is an earthing point, remove them all. Also unplug the four
injector plugs, you may want to sticky label these with tape numbered 1 to 4 from
right to left as they can get mixed up during refit.
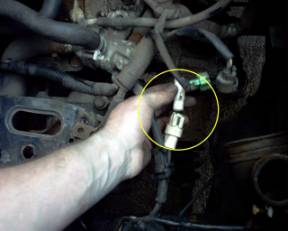
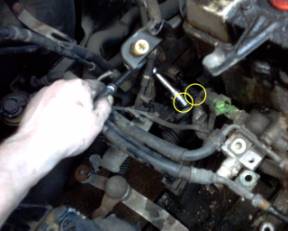
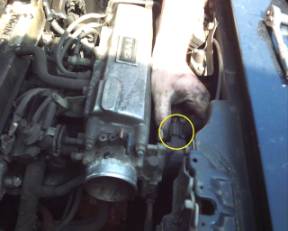
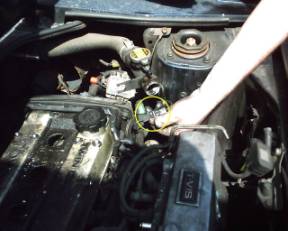
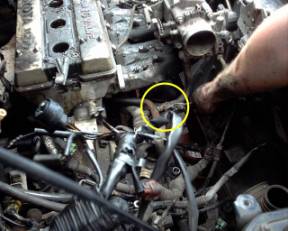
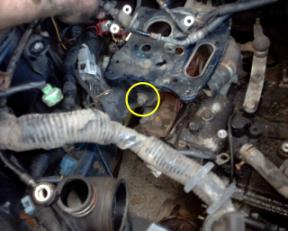
You can now remove
the cold start injector banjo from the fuel rail (yellow) and remove the fuel
return line fitting from the end of the fuel rail (not shown), unplug the
electrical plug to the cold start injector (blue). The three 12mm fuel rail bolts
can now be removed.
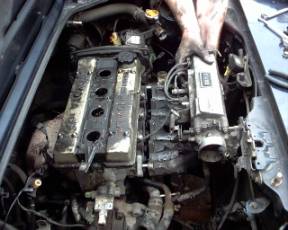
Remove the fuel
rail completely. Now you can start to remove the engine wiring harness, start at
the distributor and lift it off feeding it through the inlet manifold eventually
lying it all over the passenger side of the car.
On the right theres
five bolts holding the inlet manifold on, theres also four underneath the
manifold and also a manifold steady bar that’s bolted to the manifolf and also
the block, remove all of these and lift the manifold off the engine. The engine
will actually come out with the manifold left on but its much easier with it
removed.
Remove the two water pipes that feed the waxstat on the throttle body, the manifold is
now ready to slide off.
Now the t-vis rail
can also be removed, sometimes this comes off with the manifold. If you are
refitting this try to look after the gaskets. Now that the manifold is off you
have good access to unbolt and remove the alternator, again this would come out
with the engine but its easier if its removed. A 12mm bolt on the adjuster and
two 14mm on the pivot bolt.
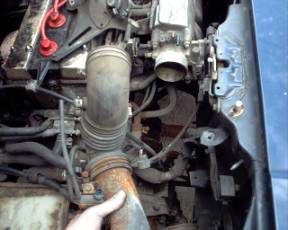
Undo all six nuts
on each driveshaft and tie each shaft up out of the way, I use thick cable ties
secured onto the strut tops for this but anything will do. Undo the exhaust
middle hanger bracket and remove.
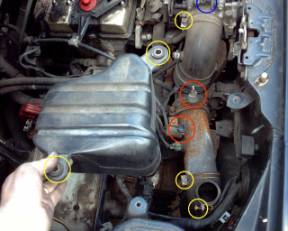
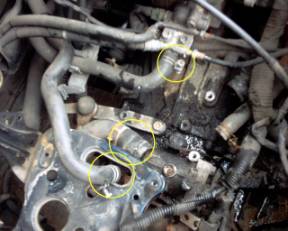
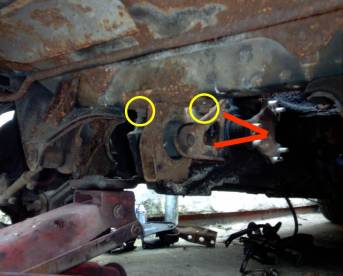
Remove the three exhaust to manifold nuts (yellow) and the two front torque mount 14mm
bolts circled red. On the right remove the rear torque mount via the
two 14mm bolts on the chassis (yellow) and the two 14mm bolts on the gearbox
(red).
With the engine
supported either by jacking trolleys underneath or by a hoist from above, undo
and remove the right engine mount, one 14mm bolt from above and two from
underneath. Undo the two from underneath first as a safety measure. Undo the 17mm
bolt that passes through the right hand engine/gearbox mount.
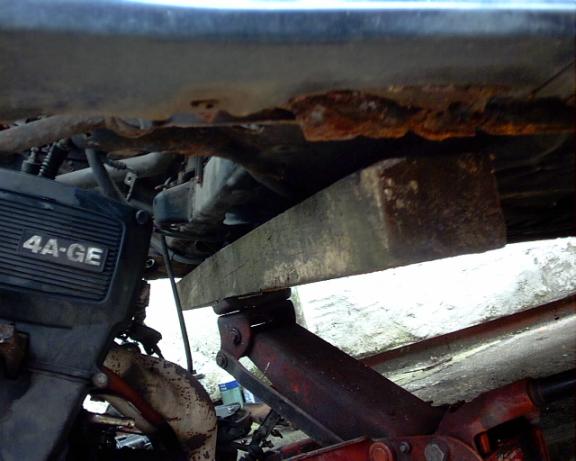
Gently lower the engine/gearbox to the ground taking care not to foul anything on the
way down. Now place a jack under the front engine bay crossmember supported by a
large piece of 4x3 to spread the load. Slowly jack the car up off the engine
until there’s enough height to pull the engine out from the rear.Under no
circumstances must you rely on this jack and beam alone before attempting to pull the engine out.
Make sure a couple of axle stands are in place beforehand.
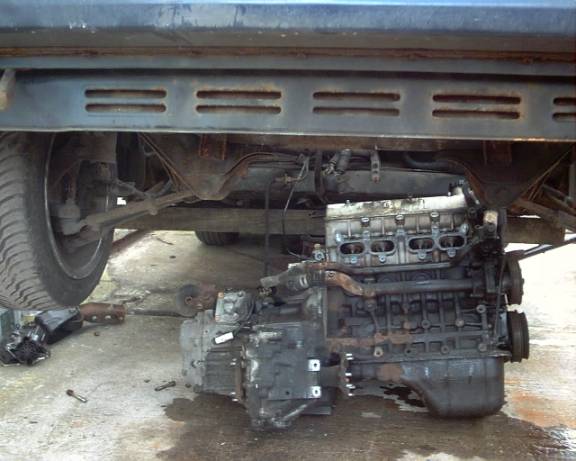
Finally pull or walk the engine out from underneath the car, its quite light and swivels
around easily. The refit procedure is an exact reversal of this article. I hope it
proves useful to someone attempting this for the first time. If you have any
queries at all then please ask, advice is always free.
Paul Woods.