'87+ BRAKE UPGRADE
All you need to upgrade your 85/86 to the bigger 87+ rotors are
the rotors themselves and the caliper mounting brackets. If you want to go all
out for this upgrade, you will need the dust shields from the 87+. You'll need
new brake pads too, since you are using new rotors. Any year brake pads will
work, they are all the same.
*Note: You will probably notice that I mixmatched front and rear pics
throughout this writeup. I'm not trying to confuse you, it's just the best pics
I had when I threw this page together.
1) First off, put the car on jackstands, and remove the wheel.
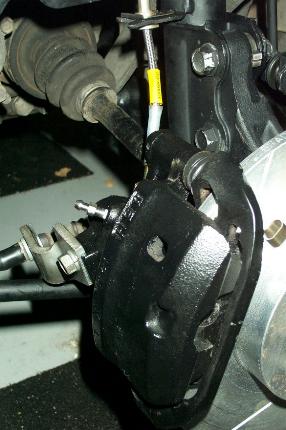
2) Remove the two 12mm bolts holding the caliper to it's mounting bracket.
Slide the caliper out of the way and secure it in place so as not to bind or put
pressure on the brake line.
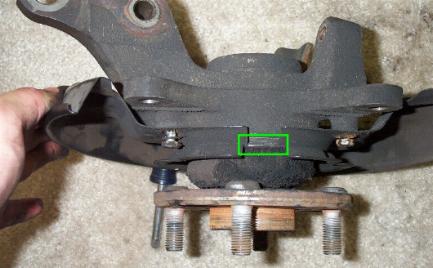
3) Remove the two 17mm bolts circled below holding the mounting bracket to
the hub. (Ignore the fact that the strut assembly is removed from the hub, you
don't have to do that.) Remove the mounting bracket and brake pads off from the
rotor.
4) Remove the rotor from the hub. It should just wiggle right off, but it
could be stuck on there good. You may need to get two bolts the proper size to
push the rotor off the hub.
5) Now you need to decide what to do with the dust shield. There's 3
possibilities, each involve snipping off part of the shield: Notice one of the options isn't to replace the axle carrier (hub) with the
87+. Here's why you can't courtesy of Bill Merton as he tried going this route:
"Can't be done. The tabs where the axle carrier (hub) mount to the struts on
85-86 are too thin to accommodate the wider 87+ hub assy. And larger bolts are
used on the 87+, as well. You'd have to shave down the edge of the hub and drill
the holes in the strut to do this. Ah...so I'll just change the entire strut
assembly...solves that problem, right?
"Next problem...the big metal pieces that the strut arm and control arm bolt
to (that are bolted on right behind the engine compartment) are different. No
problem...I'll just shorten the control arm by using the 87+ arm and thereby
account for the fact that the 87+ axle assembly's control arm mounting point
sticks out farther. Wrong. The angle is too steep and you end up with an amazing
amount of rear wheel toe-in. )...
"Okay...so those damn mounting blocks need to be swapped, too. Wrong. The
mounting holes on the frame are in different spots between 86 and 87+. Only one
really lines up and without significant modification, those 87+ blocks simply
won't bolt on. Even IF you managed to do all this, remember to swap your ball
joints while you're at it. The mounting bolts for the 87+ are much larger and
the 86 ball joints won't bolt up." Remove the three bolts holding the dust shield on the 87+ assy.
Cut a wedge out of the bottom of the dust shield wide enough that you can
wiggle it free of the hub assy.
Remove the 85-86 hub the same way.
Slide the 87+ shield on the 85-86 hub.
Note points of interference, especially where the strut arm mounts up.
Cut away material or bend as necessary to make the shield work.
I just went ahead and remove the shields completely. I haven't had any
problems for the year it's been done (2500 miles). Here's how you do that:
Remove the 3 torx bolts. Just use a 10mm socket to remove them. Here's a pic
of the bolts, there's a third one on the opposite side as well. You have to go
at these at an angle, because the hub is in the way. It also took a pair of
pliers on the nut driver to get these loose.
Now the dust shield should be loose. However, you can't just pull it off over
the hub. So you need to cut a slot in it so you can. Do that in the spot below
with a dremel or rotozip type tool.
I ended up having to cut off more than indicated above, since the metal was
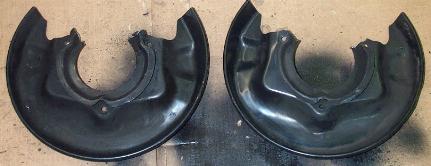
not as flexible as I thought. Used the side-cutting bit on a Rotozip. Here's the
dust shields off, to show you how much you need to cut off.
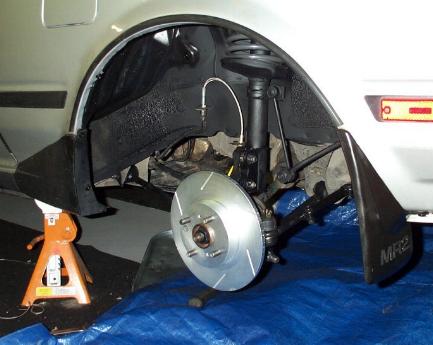
6) Now that the new bigger rotors will fit (no matter which method you picked
above), slide those bad boys on.
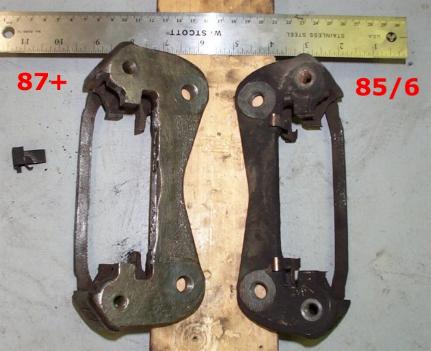
8) Here's some pics of the mounting brackets. These are the heart of the
conversion; what you'll have to find from a fellow MR2 owner or the junkyard. I
believe the Toyota dealer will only sell these with new calipers, never asked
them though.
Front:
Rear:
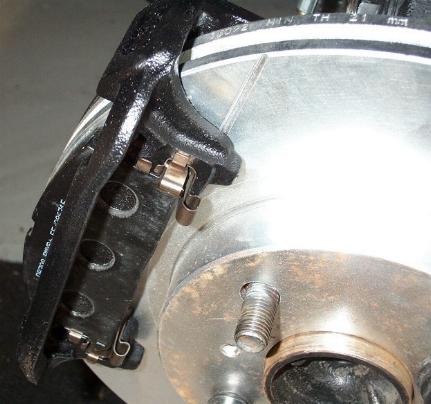
8) Move the various spring clips that hold the brake pads in place over to
the larger mounting brackets. If you get lost doing this look in the BGB or
Haynes manual for a diagram to help. It's not that great of a diagram, but it
works. It may be better to do this after you get the bracket on the hub. You
decide...
9) Place the larger 87+ mounting brackets onto the hub with the two 17mm
bolts.
10) Insert the new brake pads.
11) And finally, slide the caliper over the pads and attach it to the
mounting bracket by the two 12mm bolts.
12) Replace wheel and lower from jackstands. Repeat for the other 3 wheels.


Replace it with
the larger 87+ dust shield
Cut/Trim it to fit the rotor
Remove it
completely
Here's how you can use the larger 87+
dust shields, courtesy of Bill again: