INTAKE FILTER MOD
This is a very common modification for the
MR2 and usually the first people do. The standard air filter setup is quite
restrictive to airflow. There are quite a bit of write ups for this one, but
hopefully I can provide you with more detailed pictures for performing the mod.
Things may be slightly different for later cars.
Results after doing this include faster
revving and a louder note from the engine above 3000 rpm and this mod has been
dyno'd (not by me and my setup though) and showed about a 5HP peak increase in
the upper rpm band. One thing I did notice, is that there is a slight buzzing
from the intake between 4000-4200 rpm. Nothing to worry about though, something
about resonant frequency causes this.
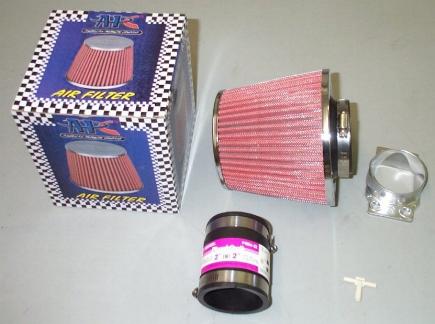
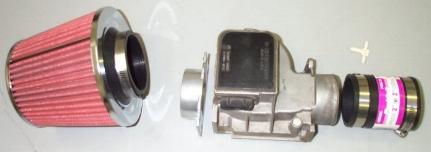
Here's what you need to do the basics (there are a few places that sell the entire kit online, I went the separate
purchases route myself):
The cone filter, which you can purchase at your local Pep Boys.
It has a 3" fitting on the end, which is a little large for the AFM, but you can make it work.
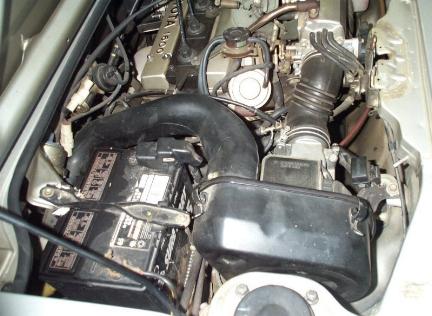
Removal
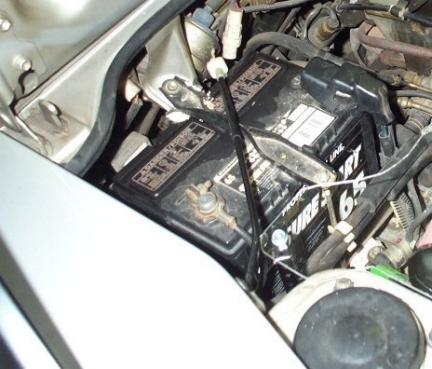
1) Here's the standard setup. Begin by removing the air filter and its cover:
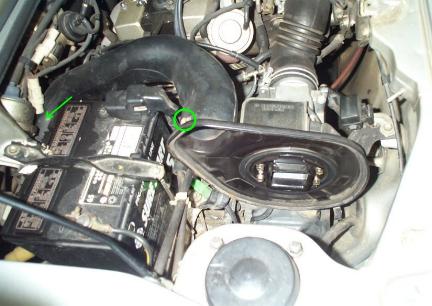
2) Remove the snorkle, by removing the
10mm bolt and unclipping it from behind the battery.
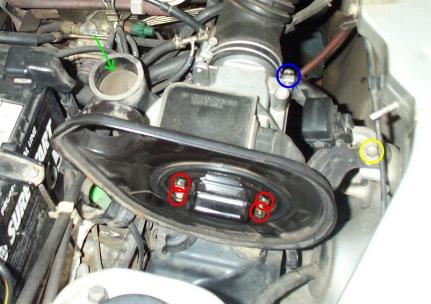
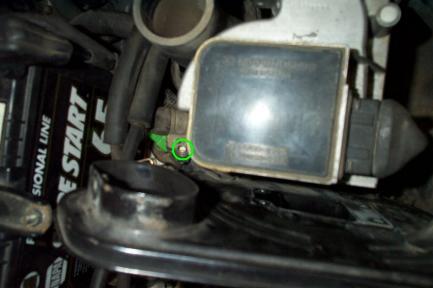
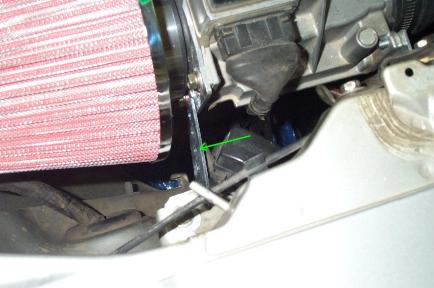
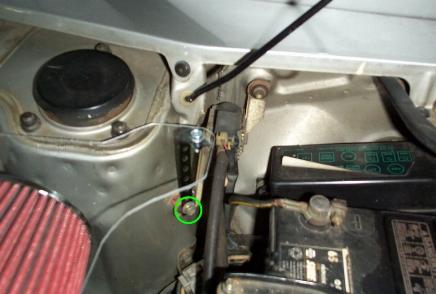
3) Pull the hose pointed to by the green
arrow up and out. Unbolt the 4 10mm bolts (red circles). Remove the yellow and
blue circled 10mm bolts. You need to remove the blue circled bolt for when you
pull the air filter plate and resonator box out.
Here's another bolt that you need to remove.....
.....and another:
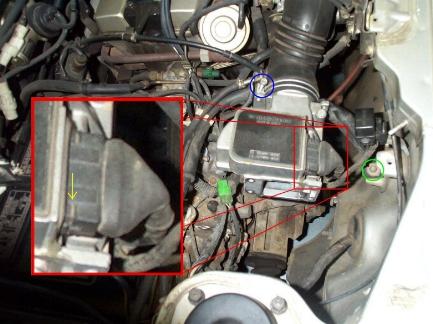
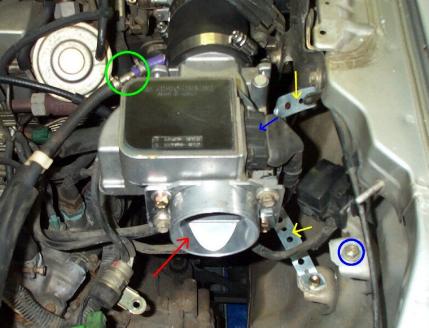
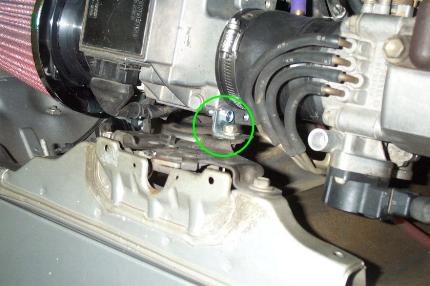
4) Now all that junk should be out. Next
is removing the AFM. Remove the bracket by undoing the green circled bolt.
Remove the AFM wiring plug in the red box. To do this take a small flat-tip
screwdriver to pull the clip in the direction the yellow arrow is pointing. The
plug should then pull straight out. Loosen the blue circled bolt holding the hose onto the AFM.
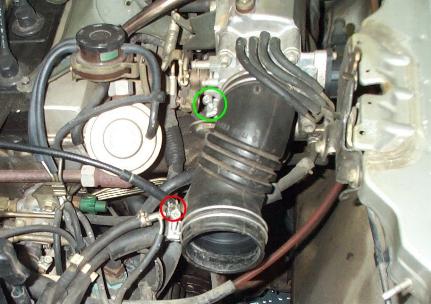
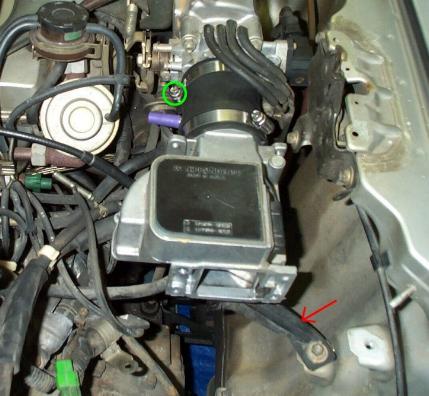
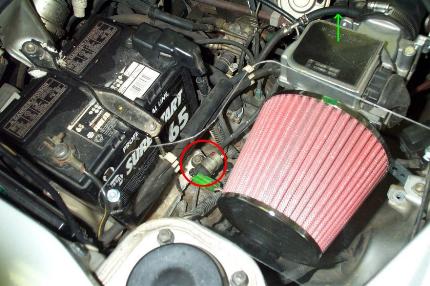
5) Loosen the bolt (green circle) for the
hose clamp holding the hose to the TPS. Also, remove the AC idle-up line (if you
have AC) by loosening the hose clamp (red circle) with a pair of pliers.
Note: Since you have gone this far in the
process, you will notice a nice coating oily residue inside the throttle body
and on the butterfly valve. If you would like more info and pictures of cleaning
out the TB see the TB and TPS page.
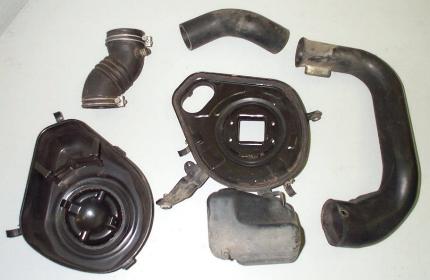
6) Now here's all the crap that you have
just removed and will not be putting back into the car:
And here's the newer, simpler system that's going in:
Install
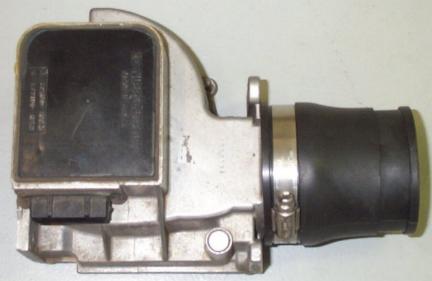
1) Place the 2" coupling onto the AFM.
This is the toughest part of the whole process. You will need to work the
coupling so that it will stretch over the AFM. I found that by inserting a pair
of pliers and pulling the handles apart was an easy way to stretch the coupling.
After doing this for a minute or so,
putting the coupling on the AFM was quite easier. Tighten down the hose clamp.
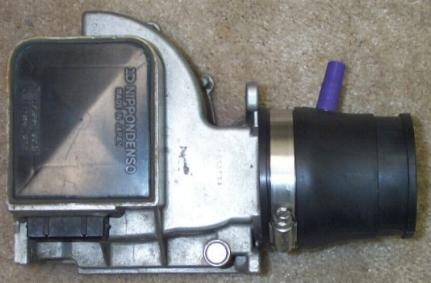
2) If you do not have AC, go to step 3.
Now you will need to tap into the coupling with the fitting that you decided
upon. (You could also tap into the AFM itself to use a screw type fitting, but I
do not have the tools to do this). I used a tiny Phillips screwdriver to start
my hole, and gradually made the hole bigger until it was a real tight fit with
the fitting. Here's the AFM with a purple hose attached to the other end of the fitting.
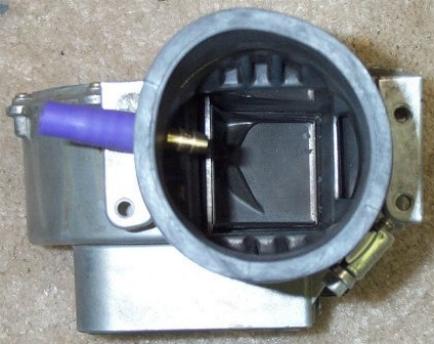
And here's a view looking into the AFM, you can see the brass fitting:
3) Connect the AFM back to the TPS, using
the circled hose clamp. Ignore the bracket pointed to by the red arrow. I put it
there to temporarily support the weight of the AFM
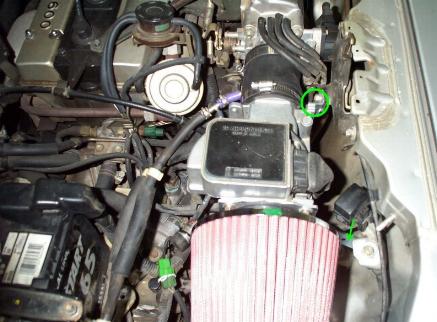
4) Lots of steps here. Connect the AC idle
up lines in green circle (if you have AC), attach the AFM adapter pointed to by
red arrow by four 10mm bolts, fabricate some brackets (I redid this with strong
metal, see the bottom of this page for the new ones), connect the AFM plug (blue
arrow) and the diagnosis plug bracket (blue circle).
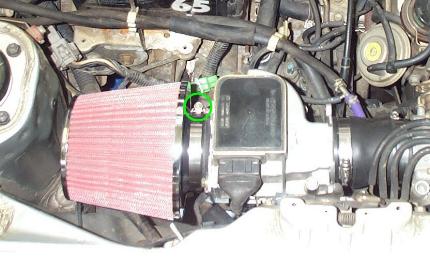
5) Finally, attach the filter and tighten the circled hose clamp.
Also, find a place to attach the VSV that
the AC idle-up line is connected to. Mine is temporarily twist-tied to something
else, until I get a longer piece of silicone hose.
Rain shield and Better Brackets
To make the AFM and Filter a lot stiffer,
I redid the brackets from some stiffer scrap metal pieces.
The first one is attached to the bottom of
the engine lid release bracket and to the back side of the AFM:
The other bracket attaches with bolt and
nut to a hole, found under the bracket for the diagnosis plug, and to the AFM adapter plate.
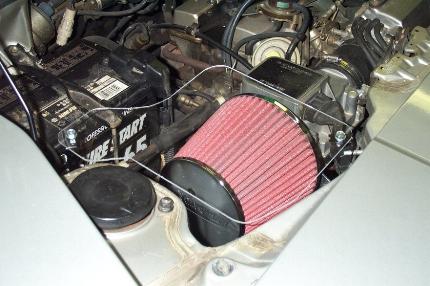
And finally the finished setup with the
rain shield made out of plain old clear plexiglass, cut with a Rotozip and smoothed with a file.
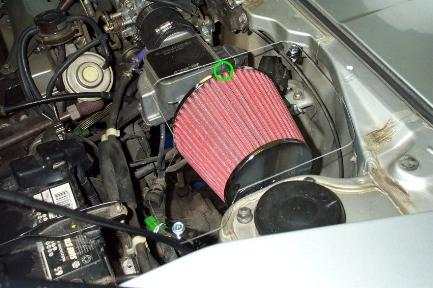
Here's another view. Circled is a piece of
green felt, as the plexiglass contacts the top of the filter. This stopped some
vibration and possibly scratching of the plexiglass.
Here's how I did the brackets for the
plex. To remove the plex, it only takes the removal of the below circled bolt.
The other bracket is just slid over the
engine lid prop rod rest pin. This way you don't have to mess with touching the
bolts that attach the brackets to the plex. (In the below picture you can see
where the metal bracket attaches to the AFM adapter plate.)
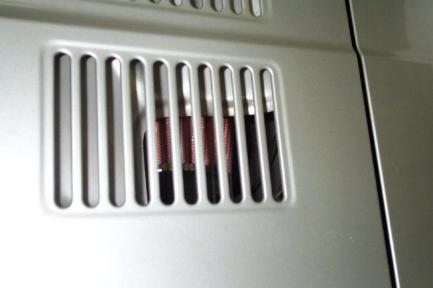
And here's why you need the rain shield:
Replaced temporary vacuum hose with a
longer piece (about 5") and remounted VSV properly to where the battery sits.
Also, here's how I have to store the prop rod when the engine lid is down.
If you have an 85-86 you will need the AFM adapter on the right.
You can find these at your local junkyard, by looking in a Nissan 240/280x.
2"-2" coupling, which you can purchase at your local hardware store in the plumbing section.
If you have AC you will need a fitting to hookup
the AC idle-up line to the above coupling. I ended up not using the one shown
below, instead I stuck with the stock T-fitting and added a 1/4" barb splicer with some spare hose.
Also, it's a good idea to add a rain shield so that water doesn't run from
the engine lid onto the filter. So grab some plexiglass or lexan.
Various scrap metal and bolts to construct brackets that hold the AFM and plexiglass in place.
Total cost is around $50.