IGNITION TIMING
Here's just a write up to help you with
checking and adjusting your ignition timing.
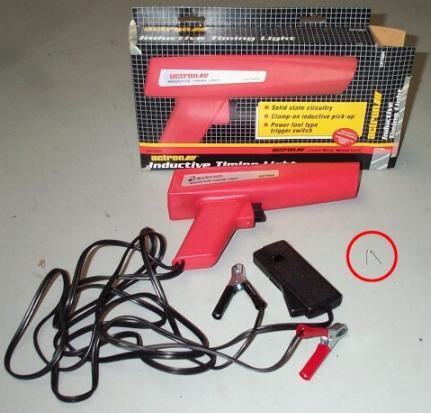
Here's what you need: A timing light that
you can purchase from Autozone, Pep Boys, etc. It runs between $25-$100. I
picked up the inductive kind, that way I don't have to worry about messing with
the spark plug wires, it was around $35-40. Also need a paper clip, or some kind
of other tiny conductive metal piece so that you can jumper 2 terminals. I used
a safety pin with the 'head' cut off.
1) Warm up the car so that it is at normal
operating temp. This is important, so try doing this after you have gone on a
drive. Leave the engine running & in neutral.
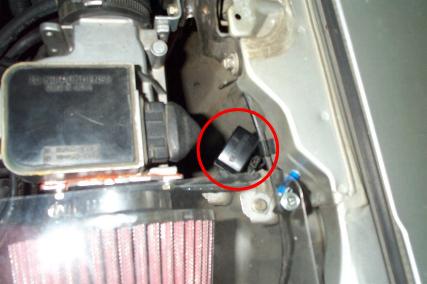
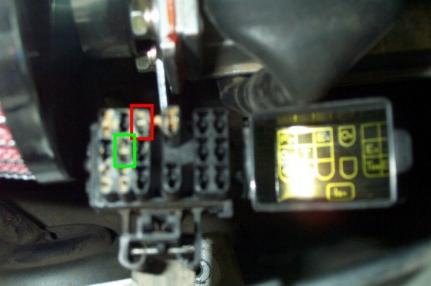
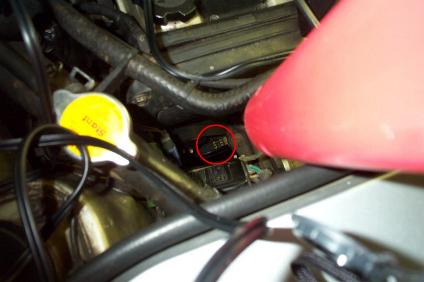
2) Locate the diagnosis connector near the rear trunk.
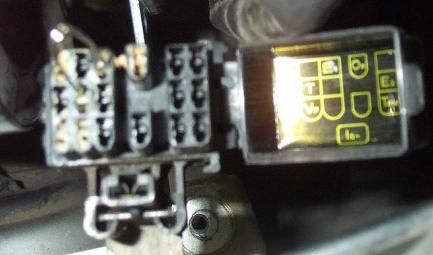
3) Open it up and you should see the many
terminals. You can see which terminals are which on the underside of the cap.
Highlighted here are the 2 of importance, E1 (red) and T (green).
4) Connect the safety pin/paper clip between these 2 terminals.
5) Consult the instructions for your
timing light on how to hook it up. Here's how mine is done. Connect the positive
clamp of the timing light to the battery (red) and negative to chassis ground
(green). Also clip the inductive pickup around the #1 spark plug wire (yellow).
6) Next, pull the trigger on the timing
gun and point it into this direction aiming at the red circle, right at the top
of the crank pulley.
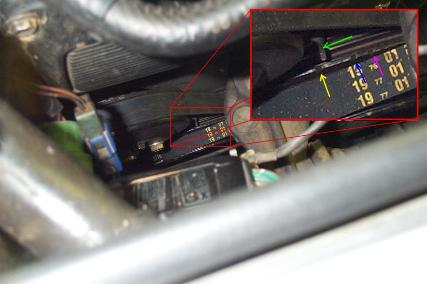
7) The timing light should then flash each
time the #1 spark plug fires. Here is what you should look for as you point down
at the crank pulley. The green arrow is pointing to the timing pointer. That is
going to be your reference point. You need to find this before you are able to
do any kind of adjustment. (You may want to find this first with a regular
flashlight, if you aren't sure where it is located.) The 3 notches on the crank
pulley, that the different colored arrows are pointing to, are indicators
telling you where TDC (top dead center, yellow), 10 degrees advanced (blue), and
16 degrees advanced (purple).
When you look down with the timing light,
it will seem as though the crank pulley is standing still, and the notches
should be just sitting there. If you saw the below pic in your car while you
were actually using the timing light, the engine would be running at about 2
degrees advanced. You would need to adjust the timing, since the BGB calls for
10 degrees advanced (with the T and E1 terminals shorted). So, if you see the
timing pointer pointing to the notch by the blue arrow, then you can skip the next adjustment step.
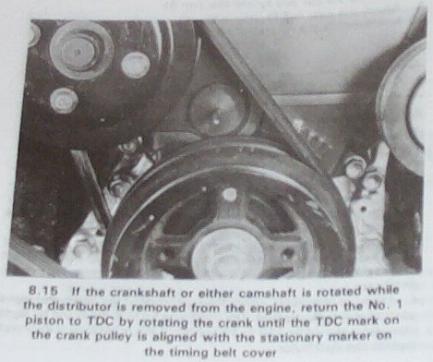
Here are a couple more pics taken from the Haynes manual.
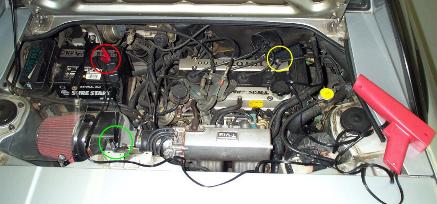
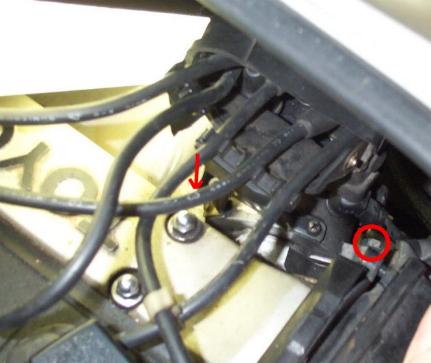
8) To adjust the timing, you need to pivot
the distributor. Do this by loosening the two 12mm bolts, that hold the
distributor to the engine head, a turn or two. They are circled and pointed to
in the below picture. Then slightly twist the distributor either toward the
passenger (to advance) or drivers side (to retard), depending on if you need to
retard or advance the timing to meet the spec. Only do this a little at a time
and recheck the timing with the timing light to check your progress.
9) Once you are at 10 degrees advanced as
indicated by the notch in the crank pulley (blue arrow above), tighten the
distributor bolts to 14 ft-lbs. Then remove the jumper you used in the Diagnosis
Connector and recheck the timing. You should then see it at more than 16 degrees
advanced (purple arrow) if you have a manual transmission and more than 12
degrees advanced if you have an automatic.
10) Take the car for a spin, and see the
results. You may need to adjust the idle a little. Or in some circumstances you
may need to adjust the timing some more to get the car to run properly.