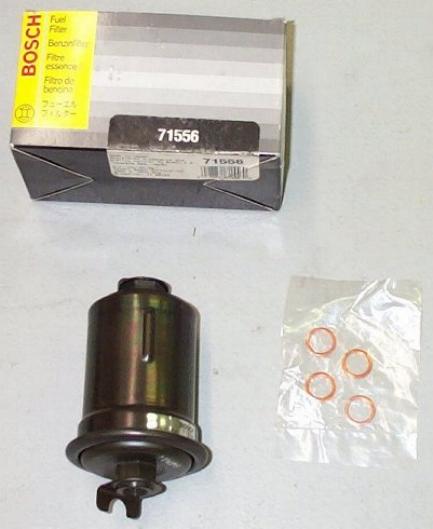
FUEL FILTER REPLACEMENT
Figured this was an easy enough task, and again, like many of my repairs on
this site, I've never changed this out since I've owned the car. Plus it was
only $20 from local auto parts store.
UPDATE 31st OCTOBER 2003 From John Low: You can get access to the bottom
banjo bolt on the fuel filter from above, if you take the battery and tray out.
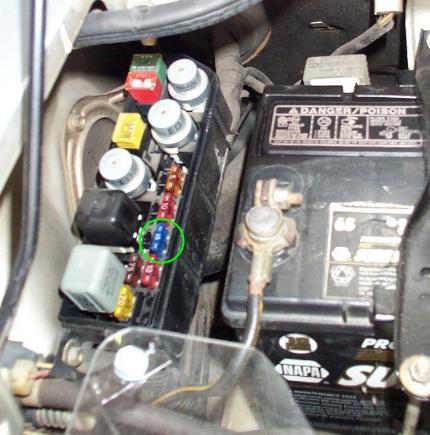
You have to get the socket in place by feel, but it's not that hard. 1) First you need to relieve the pressure on the fuel lines. Do this by
removing the EFI 15A fuse (circled below, but make sure this is the right fuse
for you). This will disable the fuel pump.
2) Crank the car, like you normally would when starting it. It should fail to
start, as there isn't any fuel pressure to feed the injectors. Try starting the
car about 7 times.
3) Jack up the rear of the car and support it on jack stands.
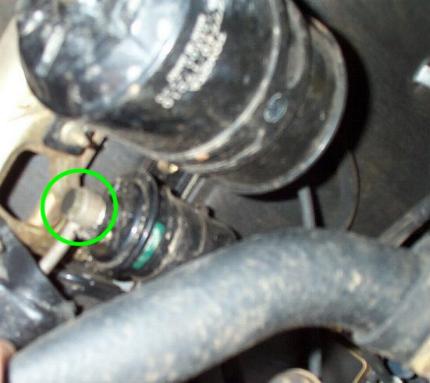
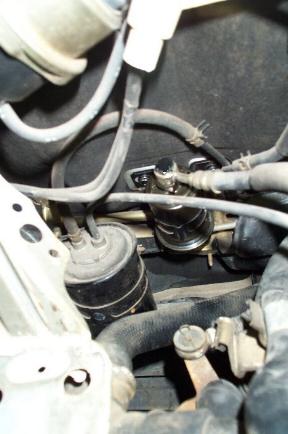
4) Crawl under the car, under where the battery sits on the driver's side.
You should see the below pic when looking up at the firewall. Remove the circled
banjo bolt with a 17mm socket. Have a rag or two covering the ratchet and bolt
as you loosen it, you may want to have a pan below the filter too. Also, wear
some goggles while doing this. Gas in the eyes burns nicely. Once you break the
bolt loose, you will get some spray of fuel. If it continues spraying fairly
hard, tighten the bolt back up, and crank the car a few more times to relieve
the pressure some more. When fuel stops coming out of the hose and filter,
remove the banjo bolt completely.
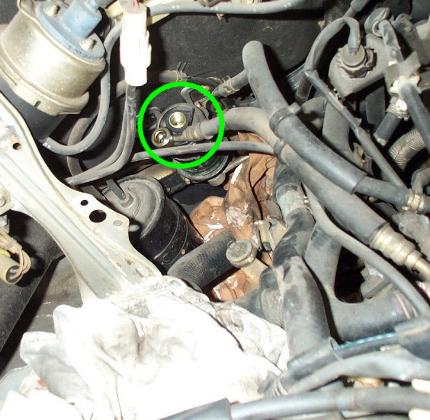
5) Now go back to above the car. Remove the battery, to allow you access to
the top banjo bolt on the fuel filter. You may be able to get to it from the
bottom, but I couldn't get the right leverage on the bolt from under there. It's
a 17mm as well. There shouldn't be much leakage of fuel here, maybe a couple
drops is all to worry about.
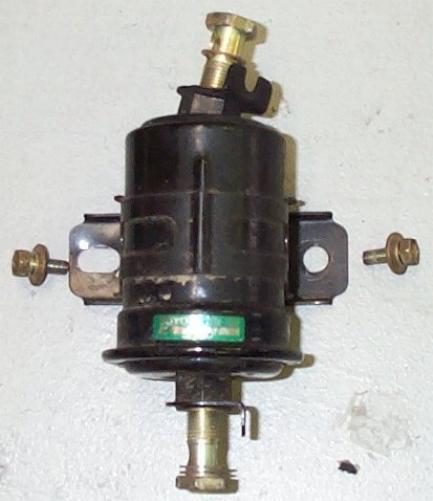
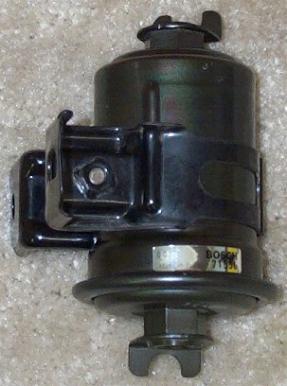
6) Now you just need to remove the two 10mm bolts that hold the filter to the
body. You can then remove the filter, here it is:
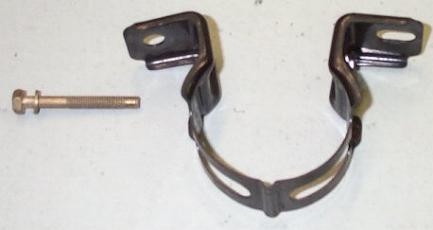
7) Remove the bracket from the old filter. There's just a long 10mm bolt
clamping it together.
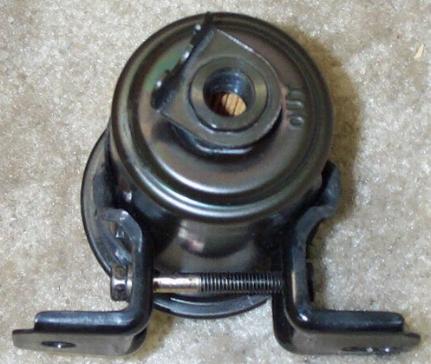
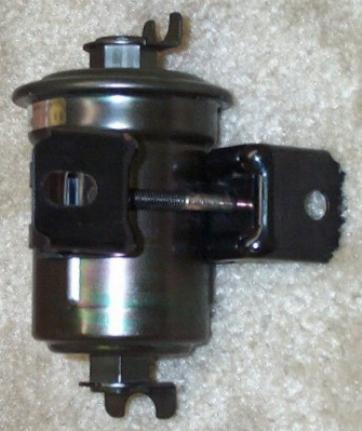
8) Place the bracket on the new filter, in the same orientation that it was
on the old. Here's a few pics to give you an idea of how it should be.
Here you can see one of the 3 grooves in the bracket that line up with the
'bumps' in the filter. It's fairly intuitive when putting it back on how it's
supposed to go.
9) Now just install the new on in the reverse of how you removed it. Make
sure to use the new copper crush washers of course. One little note when putting
it back in. Don't tighten the bracket completely in place on the firewall. Keep
the bolts fairly loose, until you get both banjo bolts threaded. Tighten the
bracket down, then torque the banjo bolts to 22ft-lbs.
10) Reinstall battery and the 15A EFI fuse.
11) Next, turn the ignition to the ON position but do not crank the car. This
turns the fuel pump on which builds the pressure back up in the fuel lines.
After about 10-15 seconds, crank the car. It may take a couple cranks.
12) Let the car idle, and check for any leaks around the banjo bolts.
13) Shut off car, and remove car from jackstands.
The only hard part here is getting a good angle on the banjo bolts. Takes
about an hour to complete.
On
mine, some gorilla had tightened the bottom bolt up to a thousand Nm (give or
take ...), but I was (just) able to get a long torque wrench onto it and loosen
the bolt off - again from above. With the torque setting wound right up it still
"broke" as it loosened!
Also, on my replacement fuel filter (cheaper from
Toyota than Halfords!) there was a new bracket already on. And both the old and
new filters had rubber bushes in the bracket bolt holes, which aren't shown in
the photos on the article on the website. Hope this is useful - John Low