REFURBISHING THE CLUTCH SLAVE CYLINDER
Since I had the transmission out of the car to do the 20V engine
swap, I decided to rebuild the clutch slave and master cylinder. It's a good
idea to rebuild/replace both at the same time. Here's the procedure for the slave.
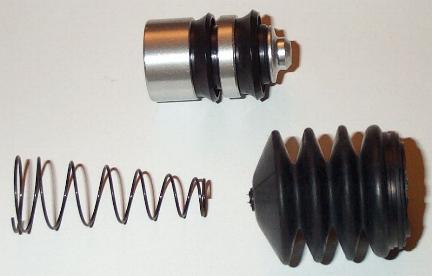
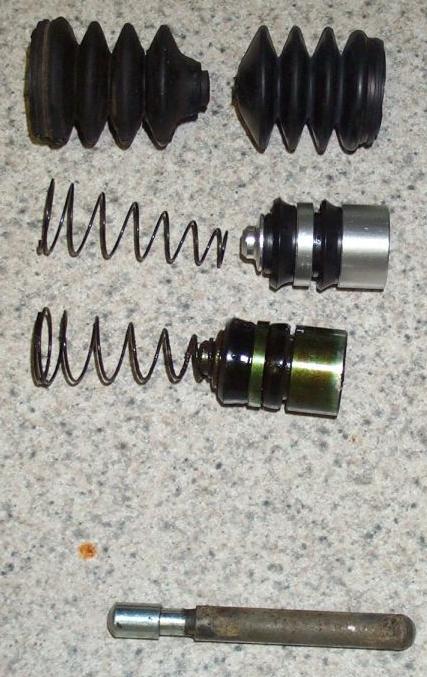
Pics of the rebuild kit from Toyota, Part # 04313-12030 - $9
Removal of Slave Cylinder from Tranny
I'm not exactly sure how to do this, as I removed mine with the tranny out of
the car. So I don't have any pics, but here's the steps from the BGB.
1) Disconnect the clutch line and bleeder tubes from the slave cylinder.
Expect some leakage. If you want to prevent as much mess as possible, bleed the
system from the bleed screw.
2) Remove the clip and bleeder tube with the bleeder plug from the bracket.
3) Remove the 2 bolts holding the slave cylinder to the transmission and
remove the cylinder.
Installation of the Rebuild Kit
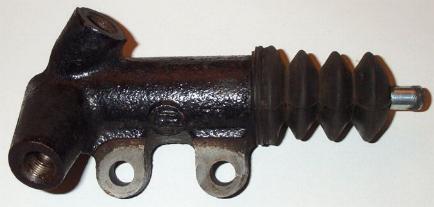
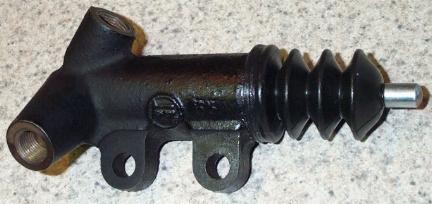
1) Here's the slave out of the vehicle.
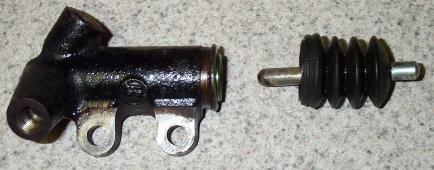
2) Remove the boot from the cylinder. You may have some brake fluid leak come
out when you remove the boot, if the piston seals have been worn. Also remove
the pin from the boot, as you will be reusing the pin.
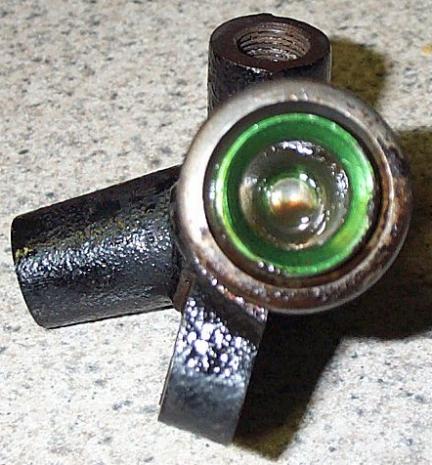
3) Now you will see the piston inside the cylinder. If your seals are as worn
as mine were, you can be able to remove the piston from the cylinder with your
finger. If you can't do this, then you will need compressed air to 'pop' the
piston out of the cylinder.
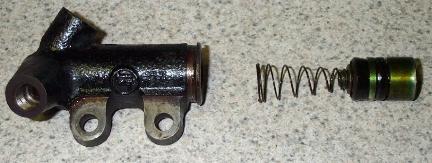
Piston and spring out of the cylinder:
The old and new parts beside each other. Notice the o-ring seals on the 2
pistons. The old ones are flat, whereas the new ones have distinct ridges.
4) Clean up the inside of the cylinder with denatured alcohol or clean brake
fluid. Also clean up the old pin, use very fine sandpaper if necessary.
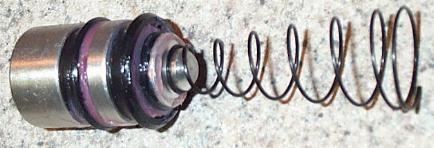
5) Attach the new spring to the new piston. Lube up the seals with grease
(use the same type of grease found in the caliper rebuild kits).
6) Push the spring/piston into the cylinder, spring first of course.
7) Slide the pin into the boot. This takes quite a bit of force, as the fit
is real tight.
8) Pack grease on the face of the piston, wehre the pin will sit.
9) Place the pin onto the piston and slide the boot over the lip of the
cylinder.
10) Reinstall the slave cylinder onto the transmission opposite of how you
removed it.
11) Thoroughly bleed the clutch.
Second version
During a weekly “look-over” on my MR2, I noticed a slightly wet look to the
clutch slave cylinder and sure enough the fluid in the reservoir in the front
compartment was lower than it should be. Purists would say that the whole part
should be renewed, but faced with a cost of £51.00 I decided to try a repair
kit. I have found from previous experience that provided the internal bore of
the cylinder is not scored then there’s a good chance that a repair kit will
work. I bought the kit from a local auto accessory shop and it’s made by MOPROD
OF NUNEATON. PART NO. MRS 128 Cost £16 (Toyota’s kit is £24.00!)
Having studied the best way of removing the cylinder, whether to remove it
from above or below, it soon became apparent that it’s not as easy as it looks
since there are quite a few cables and pipes in the way. You need a 12 mm socket
and wrench, open ended 12mm spanner, 10 mm spanner, long nosed pliers and an
automatic bleeder with new fluid. With the vehicle securely jacked up and axle
stands in place, firstly loosen the 12mm union on the incoming fluid feed pipe,
then remove the horseshoe clip on the extension bleeder pipe lower down. (This
is a sensible idea by Toyota as it gives a better access point than having the
bleed nipple on the cylinder)
It’s now possible to partly loosen off the two 12mm securing bolts holding
the cylinder to the gearbox. You can probably get at these from the top
depending on the model as I may have more pipes, cables etc. in the way on my
car.
Now remove the entire cylinder, push rod and bleeder pipe and take it to your
work bench taking care not to spill any fluid on the car’s paint work
Remove the convoluted end rubber cover and push rod and you will see the end
of the piston. The manual says blow this out with compressed air but a pair of
long nosed pliers partly opened out will extract it. Thoroughly clean out the
cylinder and only go ahead with fitting the new parts if the bore is all right.
Coat the new piston and rubber seals with special grease provided and gently
ease them in place, ENSURING YOU FOLLOW WHICH WAY ROUND THEY GO by using
the old cylinder as a reference. There is a spring which fits at the far end of
the piston.
Gently insert the new piston and seal into the cylinder bore. Now it’s time
to refit the cylinder. At this stage you need to ensure you don’t cross the
threads of the feed pipe.
Refit the securing clip on the bleeder tube and then bleed the whole system
which you can do on your own if you use an automatic bleeder preferably using
DOT 4 fluid.