|
Toyotas are
bullet proof mechanically and well built, but there are
limits. An old car is an old car, Toyota or not. As such and
with our lovely climate the MK1 will rust.
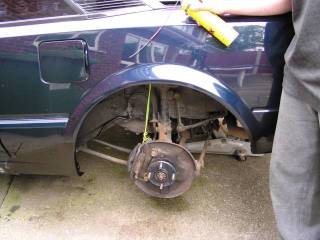
One particular
area that is a common problem on MR2s are the rear wheel
arches.
But beware -
from bitter experience if you only concentrate on areas of a
particular car that are known to rust and ignore the rest, the
rest will bite you back!
Years ago I
spent ages rustproofing my Fiat X1/9 in the areas I knew were
prone to rust. However years later all that I discovered is
that where I had rust proofed were fine, the areas I hadn't
(which don't normally rust) had.
So do the job
properly and thoroughly!
Waxoyling is a
thoroughly dirty job, especially if you use the black stuff.
Wear some disposable clothes!
Waxoyl can be
applied with three methods (or four if you include brush
painting). First method is by aerosol. This is fine but it
will cost you a fortune if you want to do a car thoroughly.
Second method is by a hand pump pressurised can. This is ok
but you can't really generate enough pressure with the hand
pump before the relief valve opens. This can be offset by
heating the can for about an hour in hot hand hot water
(agitating the can every few minutes).
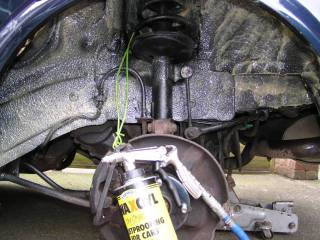
The final
method is by "Shutz" can and an air compressor. Having messed
around with methods 1 and 2, I now realise that using an air
compressor and a "Shutz" can is the way to go. I have an air
compressor but if I didn't I would simply hire one for a
weekend.
You can
generate a much better spray pattern with presssure at 100psi
from an air compressor.
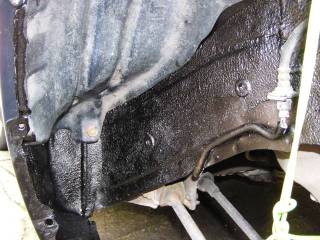
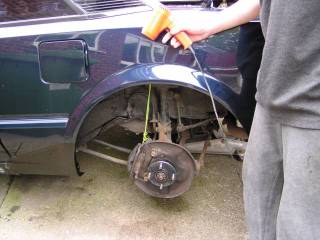
On the right
hand side are photos of the rust proofing I did on the
passsenger side rear wheel arch. This is the side where the
petrol filler is situated.
Remove the
plastic trim covering the fuel filler pipe. Thoroughly clean
the area with soap and water. Allow the area to fully dry or
use a hairdryer.
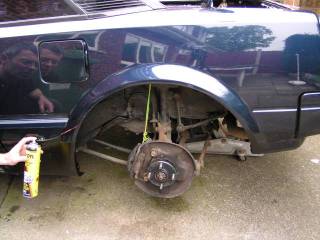
I painted the
entire area with Hammerite Underbody Seal. This is probably
overkill. I then left it for a full week.
After a week I
then fully sprayed it with Waxoyl. As you can see using a
"Shutz" can and an air compressor you can deposit a fair
amount of Waxoyl. I don't think it will rust!
The front of
the rear wheel arch on the outside of the car is covered by
trim. Because it is not visible I decided to paint it with
underbody seal (may as well).
One area that
is a bit awkward is the inside of the front section of
passenger side rear wheel arch. It's ok on the drivers side
because you can remove the air inlet grille and access the
area.
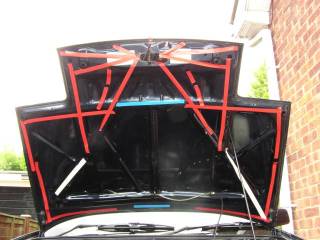
I used an
aerosol and two extension tubes. You really need to heat the
can quite a lot to generate enough pressure with two extension
tubes attached. From inside the boot I sprayed as far as I
could directing the spray by bending and setting the extension
tube.
Then I used a
hairdryer on the outside of the wing to make the Waxoyl flow
into the seam line all the way to the bottom.
Eventually
Waxoyl will dribble out at the bottom. I then redid the inner
wing from the boot to replace any Waxoyl I had melted
away.
There is also
a handy hole in the lower section of the wing where you can
also get some more Waxoxl into the lower front
section.
Another area
of note is the rear of the front wing. The side mouldings
conveniently provide a trap for foliage, soil,mud and plants
to accumulate. A handy tip is to drill a large hole in the
moulding using a holesaw.
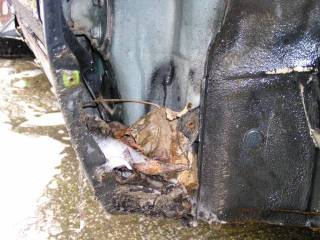
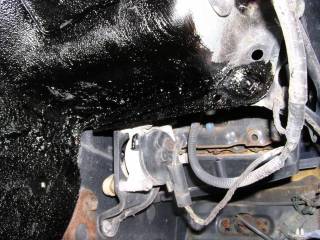
Another area
of note is the front bumper support. My car seemed completely
sound with only very light surface rust, apart from this. It
was really, really rotten. Fortunately it is not visible at
all so you can simply Waxoyl it and forget about. Only problem
is if you have a front end accident, so I'll try not to have
one!
The rest of
the car seemed fairly straightforward to rust proof, but only
time will tell on how good a job I have done....
Anyway it has
about 2 litres of underbody seal and 12 litres of Waxoyl in it
somewhere....
| 
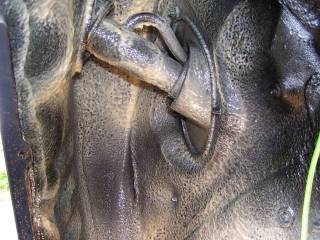
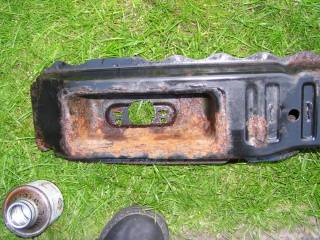 Was just about to finish
Waxoyling and was really pleased that my car seemed to be really solid,
when I found this! This is the reinforcing bar behind the front bumper. It
was rotten as hell. Anyway you can't see it so I simply smothered it in
Waxoyl and put it back.
Was just about to finish
Waxoyling and was really pleased that my car seemed to be really solid,
when I found this! This is the reinforcing bar behind the front bumper. It
was rotten as hell. Anyway you can't see it so I simply smothered it in
Waxoyl and put it back.